The internet is like a river, it can’t be stopped. We have now stepped into a digital age where our computers, phones, and traditional routers have been side-lined up so that we can join the Internet of Things era.
This is because everything today can connect online, be it your refrigerator, room lights, car, or coffee mug.
And this all comes in the IoT, where simply by adding sensors to all kinds of devices, you generate digital intelligence and allow real-time data communication. Now, if the data is collected, it has to be displayed somewhere. This is where IoT dashboards and IoT dashboard design are needed.
As an IoT solutions company, we have designed various IoT dashboards.
Today, we will share our experience and best practices for designing the best IoT dashboards.
Now, you would ask why not go with SAAS and ready-made solutions
But where’s the fun in that?
Let’s move ahead!
WHY DESIGNING AN IOT DASHBOARD IS IMPORTANT?
Well, the objective of designing an IoT dashboard is very simple; gather data from the device peripherals and display it in a slick, immersive web frontend dashboard in real-time.
The IoT dashboard is a user interface within an IoT platform that lets users monitor and interact seamlessly with the connected devices through graphs, charts, and other UI elements.

With an IoT dashboard, the user can evaluate hardware and software performance, minimizing operational costs and reducing maintenance costs by avoiding product failures. In addition to that, with an IoT dashboard, users can visualize and control specific assets and processes remotely. The users will have access to control the space from anywhere in the world.
If a dashboard is designed properly, it will empower the users and open up opportunities, specifically in the business intelligence (BI) field.
BEST PRACTICES FOR DESIGNING IOT DASHBOARDS
Through IoT dashboards, the operators will be able to collect numerous pieces of data about their work environment in real-time and will know precisely what is working and what is not so that they can manage it from anywhere, irrespective of the location.
Being an IoT solutions-providing company, we’ve equipped various operators and big companies with the superpower of a functional dashboard.
Let me share with you all the 5 best practices for IoT Dashboard designs that will make your users happy.
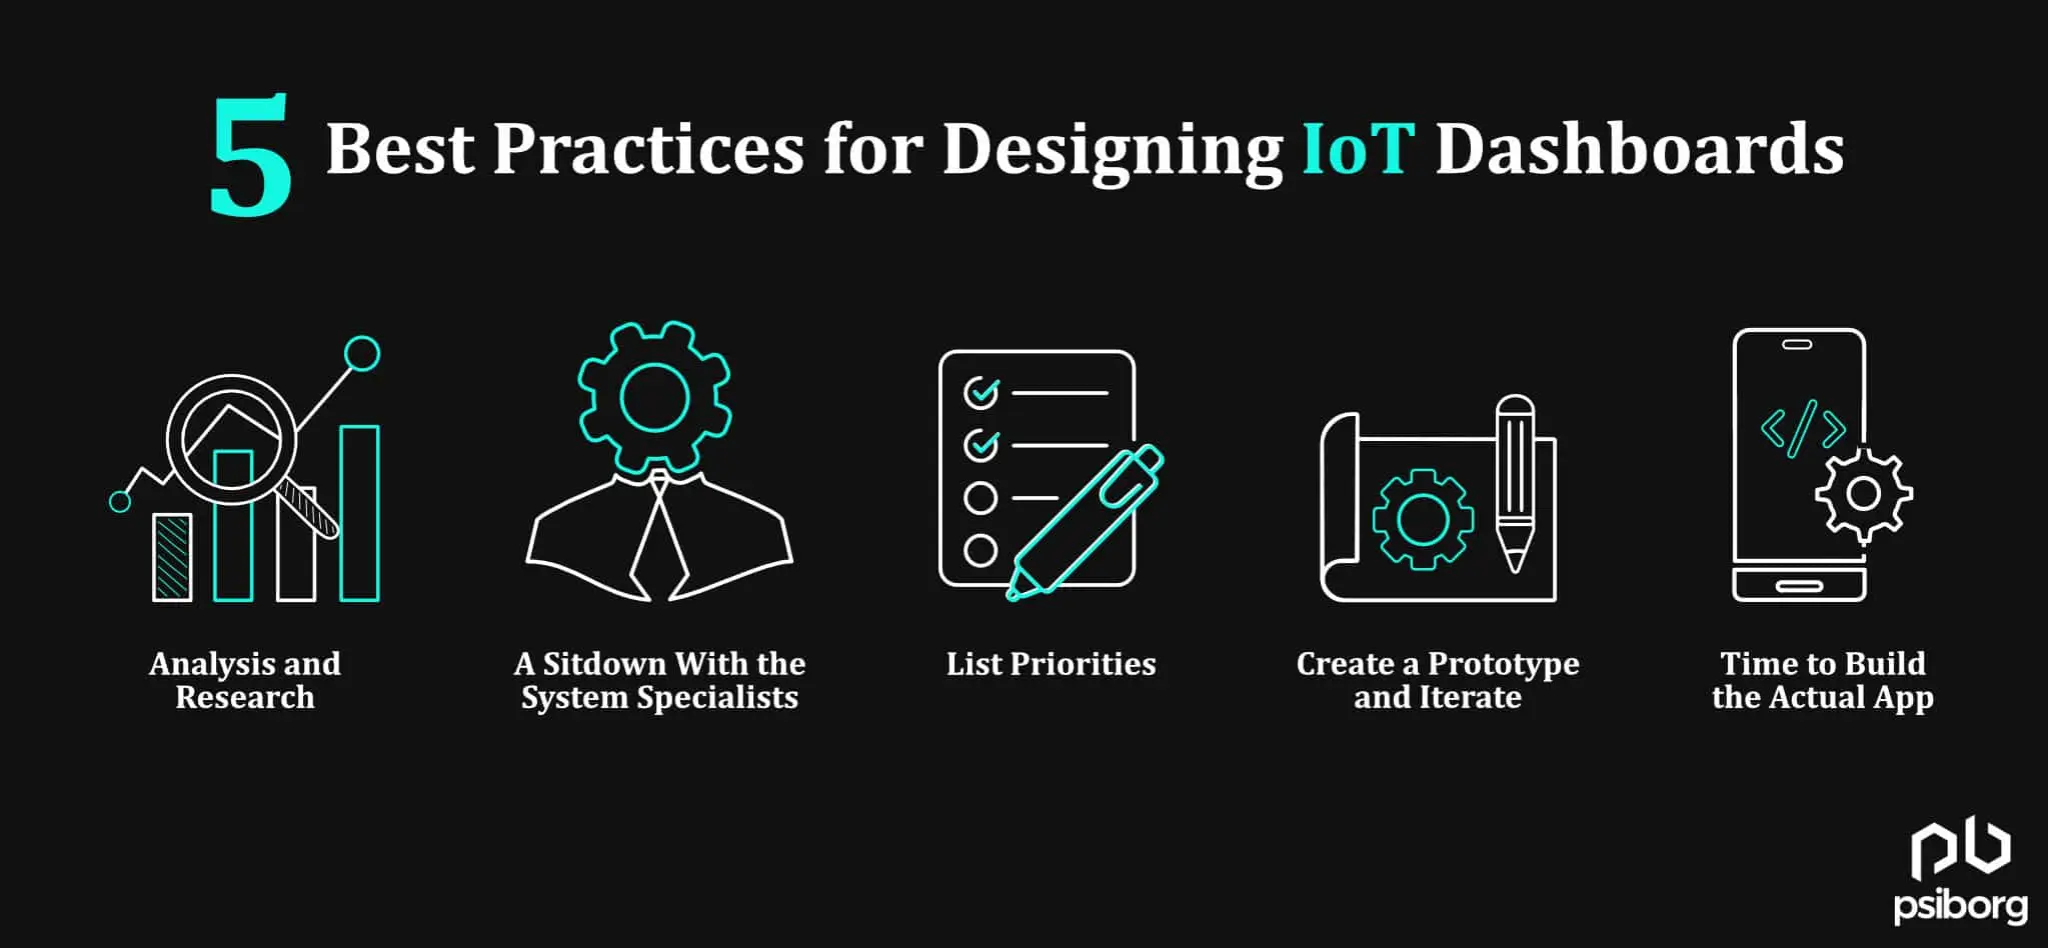
1. ANALYSIS AND RESEARCH
A thorough review of the procedures, routines, and manuals is required to develop a fully-functional IoT dashboard.
This is the first and foremost step in designing an IoT dashboard.
Let’s understand this entire thing with an industrial IoT example, the automotive industry, which uses IIoT in the manufacturing process.
The above mentioned industry has several activities that employees have to perform in a proper sequence so that nothing stops and everything runs smoothly.
We must understand and gather all the data to draw a rough roadmap of what we have to add to the interface. This way, we can have precise information on the data that should be collected and who, how, and when should access it.
Strangely, at the very first stage of analyzing procedures, we often find that some of them contradict each other. Sometimes there will be no consequences, and sometimes we have to route out the sources of serious daily problems for instrument operators, planners, and industrial workers.
2. A SITDOWN WITH THE SYSTEM SPECIALISTS
The second step is to find out what can be improved in the existing system. This can be done by having a chit-chat with decision-makers. You can ask the operators about the processes, the data, and the preferred way of presenting them.
Take the above automotive industry example. You have to sit down with the people who manage the manufacturing process. You have to interpret the theory in light of the everyday practices of the employees.
In these cases, employee interviews become essential in developing an IoT dashboard because, obviously, the operators will have unique knowledge, and at the end of the day, it’s they who will use the system to train other people to use it.
3. LIST PRIORITIES
If you have followed the above two steps, you will know the procedure, the routines, the employee struggles, and their needs.
Now you can decide what data, where, and how it should be displayed on the dashboard. This is the time to decide on components to be employed in the dashboard, like the status, temperature, camera, visuals, time, and map.
However, remember one thing, you cannot create a universal dashboard for all.
Just take the ongoing example, in the automotive industry, one operator must have two and the other must be using four monitors.
For one, the role is to watch the engine oil temperature, but for the other, it’s to keep an eye on the opening and closing of the valves.
Employee X prefers his dashboard to be clear and simple, but Employee Y loves to have eleven screens beeping and flashing constantly.
For this reason alone, a good panel should have a customization option. That’s why we always develop IoT dashboards with widgets that employees can freely change-stretch, minimize, and move—as per their requirements.
4. CREATE A PROTOTYPE AND ITERATE
The second and final step is to create and test the prototype with the users. For this, we can mix up the already collected data, sketch the panel, and then transform it into a functional MVP.
This is the time to hand over the prototype to the user to get their feedback on it. So that in the next round of development, you can implement the input and offer the upgraded version to the user.
You have to do this again and again until you get the thumbs up.
5. TIME TO BUILD THE ACTUAL APP
The final step is the actual app development.
Build your solution around devices and variables, in addition to dashboards and available alerts.
Nevertheless, pick a distinct piece of hardware to sense information in a specific setting, and contemplate the connection protocol of your choice. You can choose from Wi-Fi, Bluetooth, Sigfox, LoRa, Ethernet, and more.
WHAT DOES A GOOD IOT DASHBOARD DESIGN DO, ANYWAY?
The above-mentioned steps are like a recipe to create a good IoT dashboard . It can facilitate a user’s work and the company’s internal processes.
We know what you are thinking…
Why hustle over a simple interface, right?
So, let us break this down for you.
With a well-designed IoT dashboard………
- You can foresee the future
- Can get easy access to critical data
- Can draw business conclusions
- Will be less prone to human-made errors
- You can visually preview your devices
- You will have all the data present in real-time
- And you can manage the system faster and…
You will be one step closer to having a digital twin.
A Digital Twin (DT) is a virtual representation of a physical system. With it, you can stimulate all kinds of situations, thus making a planned investment.
However, the research required to create a digital twin depends on the research needed to make a dashboard. So, if you are thinking of starting a digital twin for your system, then you are almost there with a sound IoT dashboard.
HOW WE CREATED AN IOT DASHBOARD FOR AN AGRITECH PROJECT?
We at PsiBorg, designed an IoT Dashboard for an agritech project. In the project, Internet of Things is used to target traditional farming operations to meet increasing demand and decrease production losses.
In this Agritech project, remote sensors were used in combination with analytical tools for monitoring surveying, mapping fields, and monitoring crops. Also to provide data to the field owners for rational agriculture management. This will save both time and money for the farmers.
One of the project elements is an IoT dashboard, which is needed for IoT device management and user management.
Here, we had to design a glossy interactive dashboard. The dashboard should display all the issues related to monitoring soil nutrients and other soil requirements such as NPK value, moisture conductivity, PH, light intensity, and more.
Also Read: Sensors Used in Agriculture
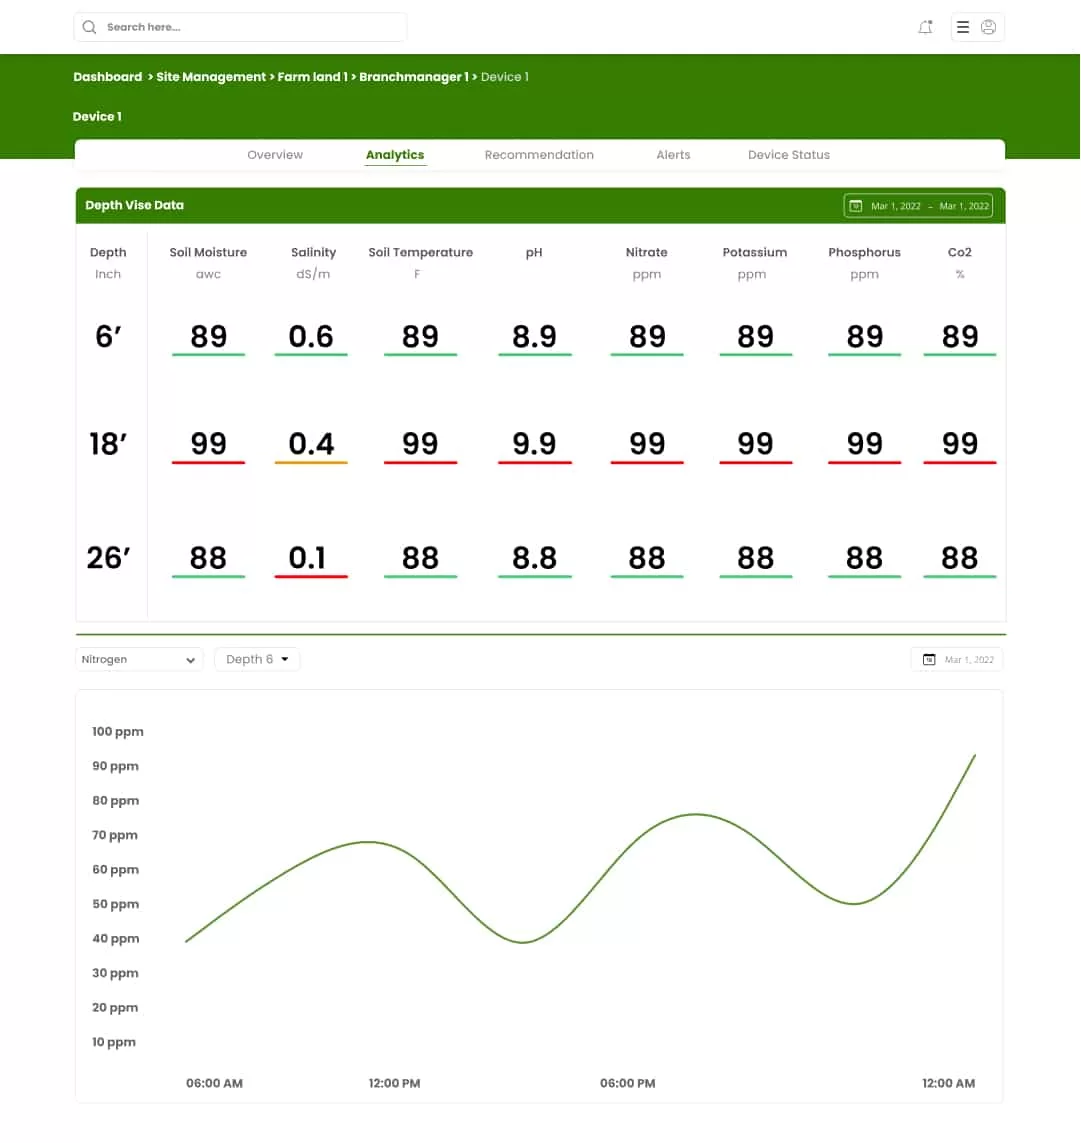
The motive is to simplify device management. This is done by allowing the user to manage and monitor the entire lifecycle of devices and sensors in one place—from planning to onboarding until retirement.
The IoT dashboard has two panels, the admin panel and the user panel. Through the admin panel, the admin can register and onboard the IoT devices and users and assign the site to a user. Besides, the admin can also monitor device information like its status and location, manage devices at scale, handle issues, and remotely configure devices.
However, through the user panel, the user to whom a specific site is assigned can view and analyze the specific field-related statistics.
To help farmers and landowners cultivate good yields, we added various analytics. These devices are installed in our office for demonstration purposes.
The data from the sensors of the branch master is shown. Each branch master and sensor node monitors data at three different soil depths. We can see real-time data as well as the history of data and insights.
Have a look at how we created an IoT dashboard for an agritech project.
Even for last year and last month. All soil parameters and their trends can be seen individually for research. The power status of every device and its RF strength can also be checked. Even the location of all the sensing devices can be checked on a map.
SUMMING UP,
A custom IoT dashboard will empower your business. Thus, you can make effective real-time business decisions and discover insights that would have otherwise been hidden.
Although, the path from learning how to build an IoT dashboard to building one is pretty long and challenging.
That is why, you should team up with a trustworthy partner who can advise you on all related matters. Also the crucial factors important elements, protocols, connections, features, and data security.
PsiBorg has the expertise to complete an IoT project as per your requirements.
So, if you need to create an IoT dashboard, wait no more and drop us a message.
Till then, Happy Scrolling!
FAQ
Ans: A fully effective and successful IoT dashboard should be clear, intuitive, and customizable. An IoT dashboard should effectively communicate and display information quickly and acurately.
Ans: One of the common challenges in IoT dashboard design is balancing the enormous amount of data for insights without confusing the user. Achieving the right balance between complexity and simplicity is crucial to delivering a user-friendly dashboard.
